
Last updated November 18, 2026
 Metal roofing
 Architectural shingles
 Tile roofing
 GAF
 Owens Corning
 Flat & low-slope
Free roof inspection with deck photos before we talk money - GAF and Owens Corning certified installation
Specialty Roofing Troubleshooting: Common Problems and How to Fix Them
Here’s the mistake I see most often, and it costs homeowners real money: somebody tries to diagnose a specialty roof with the logic of an asphalt shingle roof. It doesn’t work. Most foam roof leaks start at penetrations, not field seams. Most metal roof leaks start at fasteners, not at the panel seam. A tile leak is usually the underlayment giving out underneath perfectly good tiles. Same leak on the inside of your house, three completely different failure points on top. This guide walks through how each specialty system actually fails, how to trace a stain back to the real entry point, which temporary fixes help and which ones hide the problem, and the questions that separate a contractor who knows the system from one who’s guessing. Whitney homeowners deal with heat, sun, and monsoon-driven rain that hammer these roofs differently than most of the country, so we’ll talk about that too.
Quick Answer
Specialty roof troubleshooting starts with identifying the roof system first, because each one fails in predictable places: foam roofs at penetrations and coating wear, metal roofs at fasteners and closures, tile roofs at aged underlayment beneath the tiles, and modified bitumen at seam separation. Trace an interior stain uphill from the damage to the roof entry point rather than looking straight up. Temporary fixes like proper sealant at a known penetration buy time; caulking over an undiagnosed leak usually makes it harder to find later. Call a roofer who works with that specific system before you spend money on a repair that treats the wrong problem.
Styles & brands we work with
- Architectural shingles
- Metal roofing
- Tile roofing
- GAF
- Owens Corning
- Flat & low-slope
Table of Contents
- System-by-System Breakdown: Where Each Specialty Roof Actually Fails
- How to Trace an Interior Water Stain Back to the Roof Entry Point
- Temporary Fixes That Work vs. Ones That Mask the Problem
- Foam Roof Troubleshooting in Whitney’s Heat
- Metal Roof Troubleshooting: Fasteners, Closures, and Backed-Out Screws
- Tile Roof Troubleshooting: When the Tile Is Fine and the Underlayment Isn’t
- Modified Bitumen Troubleshooting: Seam Separation and Blistering
- Questions to Ask a Contractor Diagnosing Your Specialty Roof
- Repair or Replace? My Honest Take on End-of-Life Systems
System-by-System Breakdown: Where Each Specialty Roof Actually Fails
Every specialty roofing system has a short list of failure points it hits first, and knowing that list is the whole game in troubleshooting. Here’s how the four systems we see most in Whitney break down.
Spray foam roofing. Foam fails at penetrations first: vents, pipes, skylight curbs, AC line sets, and anywhere something pokes through the roof. The coating on top of the foam wears away from sun exposure, and once the coating thins, the foam underneath starts to degrade and take on water. Field seams are rarely the problem on foam, which is why a leak over your hallway almost always traces to a penetration somewhere uphill.
Standing seam and exposed-fastener metal. Metal fails at fasteners, closures, and penetrations. Screws back out from thermal movement, the neoprene washers under them dry out and crack, and ridge and eave closures work loose. Panel seams on standing seam metal are usually the last thing to fail, not the first, which is the opposite of what most homeowners assume.
Tile roofing. Tile itself can crack from impact or foot traffic, but the tile is a rain screen, not the waterproof layer. The waterproofing is the underlayment beneath it, and when the underlayment ages out, the roof leaks with every tile still sitting perfectly in place. Tile roofs often show leaks 15 to 25 years in, weather depending.
Modified bitumen. Modified bitumen is a rolled membrane often used on low-slope sections, porches, and additions. It fails at seams and laps, then at blisters and ponding areas. Seam separation from thermal cycling is the most common failure we find.
If your roof is a mix, which many Whitney homes are after decades of additions and re-roofs, each section needs to be diagnosed on its own terms. We handle all of these systems, and you can see our full range on the Shepherd & Sons Roofing Whitney home page.
How to Trace an Interior Water Stain Back to the Roof Entry Point
Here’s the part most homeowners get wrong. The entry point on the roof is almost never directly above the stain on your ceiling. Water enters somewhere, runs along the deck, a rafter, or the top of the underlayment, and drops through wherever it finally finds a low spot or a gap. Chasing the stain straight up usually leads you to a spot that looks fine.
Here’s the process I walk folks through on the phone before I ever get out there:
- Mark the stain and note when it grows. A pencil line around the edge tells you if the leak is active. Note whether it gets worse during wind-driven rain, steady drizzle, or only after the storm passes. That timing tells a roofer a lot about where the water is coming from.
- Locate the stain in the attic, not the ceiling. Get up in the attic with a flashlight and find the same area from above. Look for water tracks, dark streaks, or discolored wood running uphill toward the roof entry point. Water leaves a trail along rafters and decking.
- Follow the trail uphill toward the ridge. Water almost always travels downhill, so the entry point sits higher than the stain, along the trail. The trail leads you to the roof, not to a straight line above the ceiling.
- Check the usual suspects first. On foam, look at every penetration uphill of the stain. On metal, look at fasteners and closures. On tile, check flashings and valleys before you assume it’s the tile. On modified bitumen, look at seams.
- Match the roof entry point to the weather that caused the leak. Wind-driven rain comes in sideways and finds gaps a straight-down rain never touches. If the leak only shows up in a particular storm, note the wind direction.
If you can’t get into the attic safely, or the trail runs cold, that’s when a roofer needs to get on the roof. We’ll show you the deck photos before we talk money so you can see exactly what we found.
Temporary Fixes That Work vs. Ones That Mask the Problem
Temporary fixes are a real tool when you use the right one and understand what it’s for. The problem is that most of the fixes homeowners reach for on a specialty roof don’t fix anything and make the next diagnosis harder. Here’s the honest line.
Fixes that genuinely buy time:
- Sealant at a known, located penetration. If you’ve actually found the failing pipe boot or vent and the water is entering there, the correct roof-grade sealant applied to a clean, dry surface can hold a few weeks. It’s a stopgap, not a repair, but it’s a stopgap that works.
- Sandbag or tarp over a confirmed entry point during an active storm. A tarp properly weighted and tied down at a located entry point stops damage while the storm passes. Make sure whoever gets on the roof is safe about it.
- Clearing ponding or debris. On modified bitumen or low-slope foam, blocking drains or clearing leaf dams that hold water against the roof buys time and can stop the leak from spreading. Don’t scrape into the membrane.
Fixes that mask the problem:
- Caulking everywhere you can reach. Smearing sealant over a wide area makes it impossible to tell where the water was actually entering, which multiplies diagnosis time and cost later.
- Patching the foam coating with a product not meant for foam. The wrong product can attack the foam or fail to bond, and then we have to remove it to properly fix the coating.
- Sealing tile joints or over an underlayment leak. Water already inside the assembly keeps moving, and the sealant hides where it’s coming from.
- Painting or coating over a metal fastener or seam. It hides the backed-out screw or separated seam that was the actual entry point.
The rule of thumb: temporary fixes go where the water is entering, never over the whole roof. The moment you stop being able to see the problem, troubleshooting gets harder.
Foam Roof Troubleshooting in Whitney’s Heat
Spray foam is a great fit for our climate when it’s maintained properly, but Whitney’s sun and heat push foam coatings to the edge. UV exposure is the number one enemy. Every year the coating wears a little thinner, and when it thins past the point of protecting the foam, the foam itself starts to degrade from underneath.
What I check on a foam roof:
- Coating thickness. There’s a minimum thickness a coating needs in order to actually protect the foam. A coating that’s visibly worn, chalky, or letting the foam show through is past due for a recoat.
- Penetrations. Vents, pipes, AC curbs, and anywhere something pokes through are where foam fails first. Any crack or gap around a penetration is a likely entry point.
- Ponding areas and low spots. Standing water slowly works its way through the coating and into the foam. Low spots that hold water in Whitney’s monsoon season need to be addressed, not just recoated over.
- Blisters and soft spots. Foam that’s taken on water feels soft underfoot and can blister. Water-logged foam has to be cut out and replaced, not patched over, or the leak comes right back.
If the foam underneath is wet, the correct repair is removing that section and re-covering it, not coating over the top. That’s the difference between a repair that lasts and one that fails next season. Foam coating maintenance done every five to ten years, weather depending, saves a lot of trouble versus waiting for a leak.
Metal Roof Troubleshooting: Fasteners, Closures, and Backed-Out Screws
Metal roofs are excellent here, and they last a long time. But metal moves with the heat: expand in the afternoon, contract at night, over and over, storm after storm. That thermal cycling is what backs screws out and what dries out fasteners over time.
Where metal fails, most likely first:
- Fasteners with dried-out washers. The neoprene washer under the screw cracks and vanishes, and now there’s an open hole under the screw head. This is the number one metal roof leak we find on exposed-fastener roofs.
- Backed-out screws. Anything a quarter- or half-inch proud of the panel is an entry point. A screw that’s worked loose usually needs a new oversize fastener in a fresh hole rather than the same failed hole.
- Closures. Ridge and eave closures work loose, crack, or blow out. Those voids let rain in, and wind-driven rain pushes it in sideways.
- Penetrations and curbs. The pipe boots and curb flashings are the second most common failure point after fasteners.
- Panel seams (standing seam). These are the last thing to fail. Stand on a metal roof with a hose or a spray earlier in the day, and watch where water actually appears. It’s rarely the seam.
One thing to keep in mind: don’t walk a metal roof in hard-soled boots, and don’t ever walk it wet. It’s slick. If you’re not sure, don’t. A roofer can inspect it safely. If you want a proper metal install or an honest inspection, our Metal Roofing in Whitney page covers what to expect.
Tile Roof Troubleshooting: When the Tile Is Fine and the Underlayment Isn’t
Tile roofs make homeowners look in the wrong place. Homeowners see a cracked tile and assume that’s the leak. It usually isn’t, unless a tile broke clean through to the underlayment. The waterproofing is the underlayment below the tiles, and the tiles are the rain screen above it.
So here’s how tile troubleshooting actually goes:
- Look at the flashings first. Valleys, sidewalls, step flashing, and penetrations are the leading cause of tile roof leaks. Those are the spots where water gets in between the tile and the underlayment and never gets out properly.
- Then look at the underlayment age. Underlayment has a life, not a forever-life, and it’s usually the day the tile roof starts leaking. Underneath tiles, the underlayment weathers with the heat, and once it’s brittle and failing, the roof leaks with all the tile still sitting pretty. When underlayment is done, the tile can often be lifted, the underlayment replaced, and the tile set back with some new tile to replace the broken ones. That’s the decision point.
- Then the tile itself. Cracks from foot traffic, impact, or a bad original install matter if the break reaches the underlayment or if the tile channel is blocking drainage. A hairline crack usually isn’t the source of a leak.
- Then the valleys, ridges, and terminations. Those are where tile meets other surfaces, and they’re a common leak spot.
In Whitney, the dry heat is hard on underlayment, and the summer sun ages it faster than in milder climates. If your tile roof is original to a house built in the 1990s or early 2000s, underlayment performance is worth an honest look, especially if you have a leak with no obvious cracked tile.
Modified Bitumen Troubleshooting: Seam Separation and Blistering
Modified bitumen turns up on a lot of low-slope porch roofs, additions, and flat sections around houses in this area. It’s a good product, and it has a predictable set of failure points.
- Seam separation. The seam where two rolls overlap is the most likely spot for a leak, because the seam relies on adhesion and takes the brunt of thermal movement. When the seam separates, the fix is proper seam sealing, not just a smear of roof cement over the top.
- Blistering. Little bubbles or bumps in the surface can be superficial, or they can be hiding moisture trapped inside the membrane. A blister that’s cracked is an open leak point. The right repair depends on whether the blister is dry or wet inside.
- Ponding water. Low spots that hold water accelerate everything. Ponding water is the enemy of any low-slope material.
- Punctures and penetrations. Anything that pokes a hole in the membrane, or any curb flashing that’s failed, needs a proper patch and reinforcement, not just a dab of sealant.
Because these sections are almost always at the transitions between roof planes, they work well as part of a Roof Repair in Whitney inspection where several roof types meet.
Questions to Ask a Contractor Diagnosing Your Specialty Roof
When a contractor diagnoses your specialty roof, the questions they ask back tell you a lot. Here’s what to look for, and what the right answer sounds like.
- “What roof system is this, specifically?” If the answer is “it’s a roof” or they lump it all together, they’re guessing. The right answer names the system and its failure points.
- “Where’s the entry point, and can you show me?” The right answer is a specific location, ideally with photos of the deck before the repair. Sketches or hand-waving over a wide area are a red flag. We’ll show you the deck photos before we talk money, always.
- “Is this a temporary fix or a permanent repair?” The right answer is honest about which. If they can’t tell you which they’re doing, they don’t know.
- “What’s the scope and price, in writing?” Ask for a written line-item scope. The right answer is a printed scope you can keep. Anything verbal and vague will change later.
- “What happens if the leak isn’t fully fixed?” A contractor confident in the diagnosis says how they make it right, in writing. Our 90-Day Done Right Promise backs every job: if it’s not done right, we make it right, and one call brings the crew back.
- “Is the whole system at end of life, or can it still be saved?” The right answer weighs the failure against the system’s condition, not just the leak. If it’s end of life, the honest answer is it’s end of life.
An honest diagnosis on a specialty roof comes from someone who works that system every week, not someone applying shingle logic to a foam or standing seam metal roof. The difference is real, and it saves money.
Repair or Replace? My Honest Take on End-of-Life Systems
I want to be straight with you: specialty roof repair is not always the right answer. On a system in good condition with a located failure, a proper repair is the right money spent. But if the coating on a foam roof is worn past the point of protecting the foam, and the foam is waterlogged throughout the roof, a repair is throwing good money after bad. If the underlayment on a tile roof has failed across the entire roof with 20-year-old tile, patching is going to leave you chasing a moving target for years. If a modified bitumen section is blistering and ponding water across its whole surface, the same is true.
Here’s the test:
- Is the failure localized? One penetration, one fastener, one seam, one flashing. If yes, repair. If failures are showing up in three or four places at once, start looking at replacement.
- Has the underlying material been compromised? Wet foam, failed underlayment, cracked membrane. If the water is now getting into a material that’s past saving, coating over the top won’t fix the actual damage.
- How old is the system, relative to what it typically lasts? Foam, tile underlayment, and modified bitumen all have a life. Past it, plan for the right fix.
- How many repairs in the last few years? Frequent repairs are telling you what’s coming.
If a repair buys you five or more years of leak-free roof, do the repair. If it buys you a season, consider replacement. See Roof Replacement & Installation in Whitney for what that decision looks like.
Common Mistakes to Avoid
- Using shingle-roof logic on a specialty roof. Looking straight above the stain means you’re looking in the wrong place. On metal and foam roofs, the failure is usually at a fastener or penetration uphill, not directly overhead.
- Caulking the whole roof to make the leak stop. It might stop this storm, and now nobody can figure out where the water was actually coming in. Every dollar of diagnosis after that costs more.
- Calling out a contractor who doesn’t work that system. A shingle roofer diagnosing a foam or tile roof is guessing. The right diagnosis comes from someone who works that system, and the wrong diagnosis costs you twice.
- Waiting out a leak through a Whitney monsoon season. A small leak during a storm can soak insulation, stain drywall, and rot decking in weeks. Don’t let a small repair turn into a much bigger job.
- Chasing the cheapest bid. On a specialty system, the cheapest bid is often the one that skips the actual diagnosis and puts down a band-aid. A real local contractor with a published address and a written promise is worth more than a fly-by-night storm chaser.
- Not asking for a written scope. Verbal quotes are not a contract. Written line-item scopes are how you know exactly what’s being done before anyone touches the roof.
- Skipping the free second opinion. On specialty roofs where the failure points aren’t obvious, a second set of eyes is worth a lot. Our written free second opinion on any written estimate is on the house.
See the difference
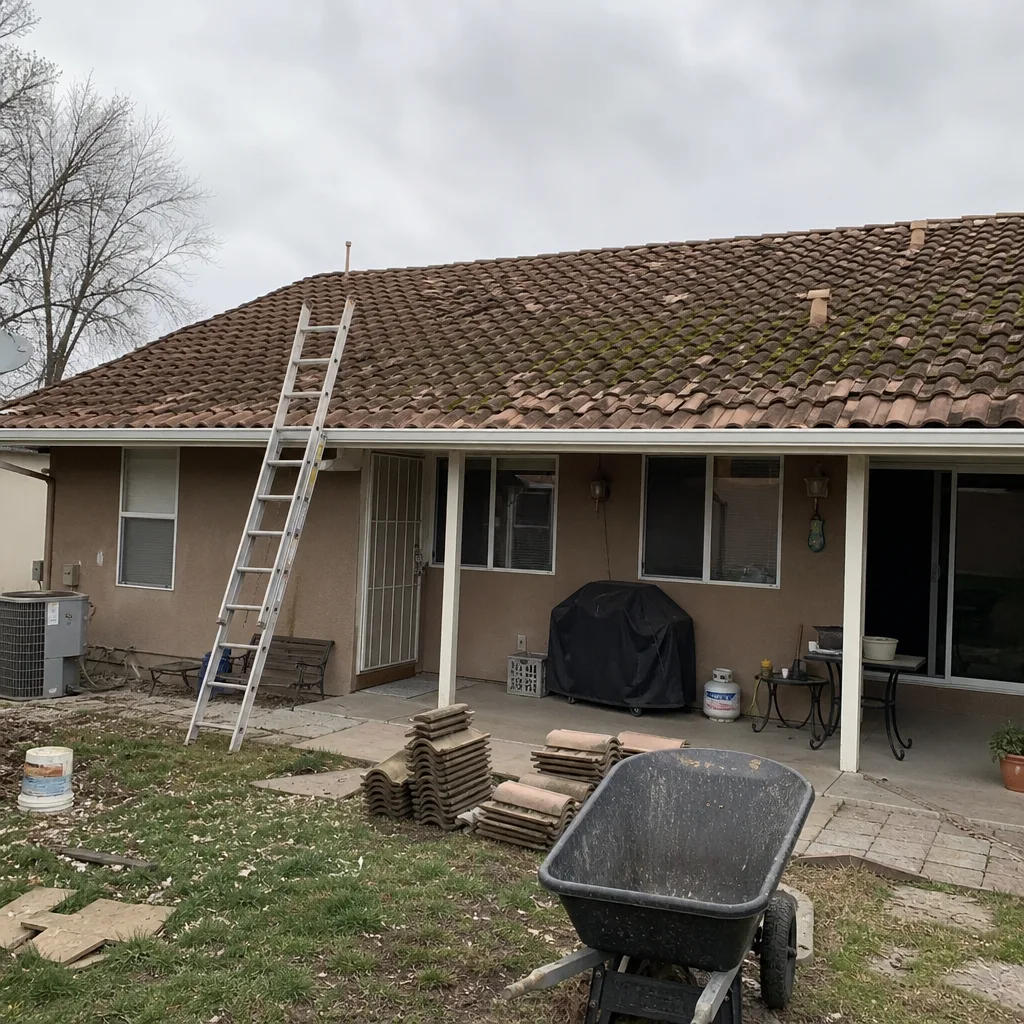 Before
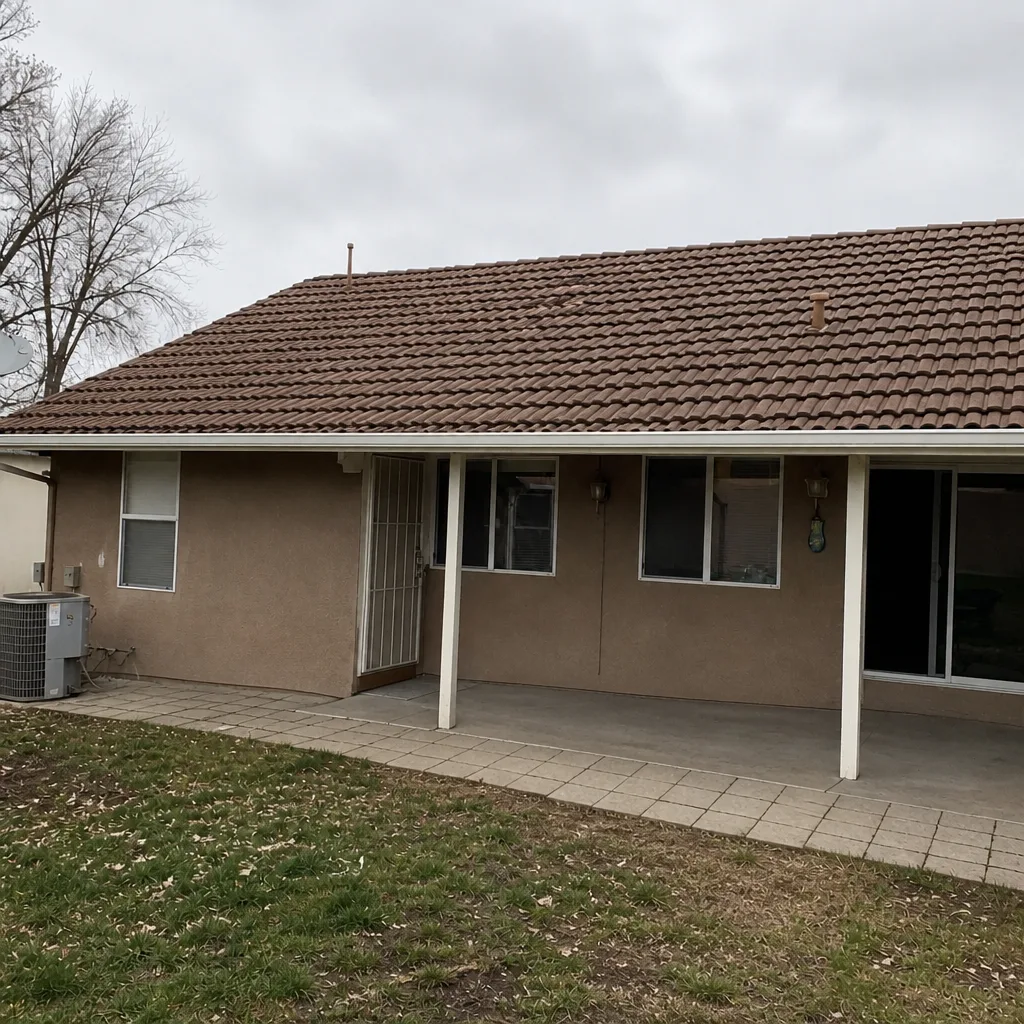 After
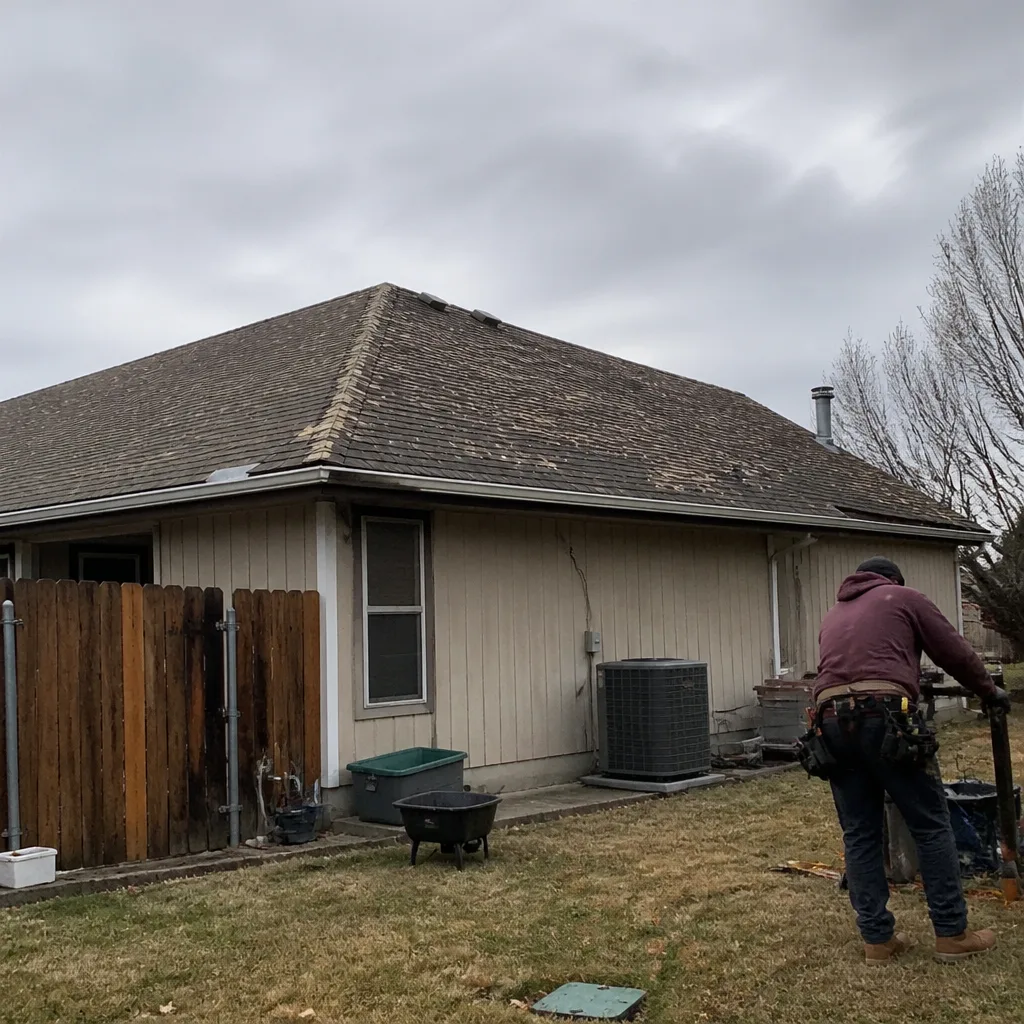 Before
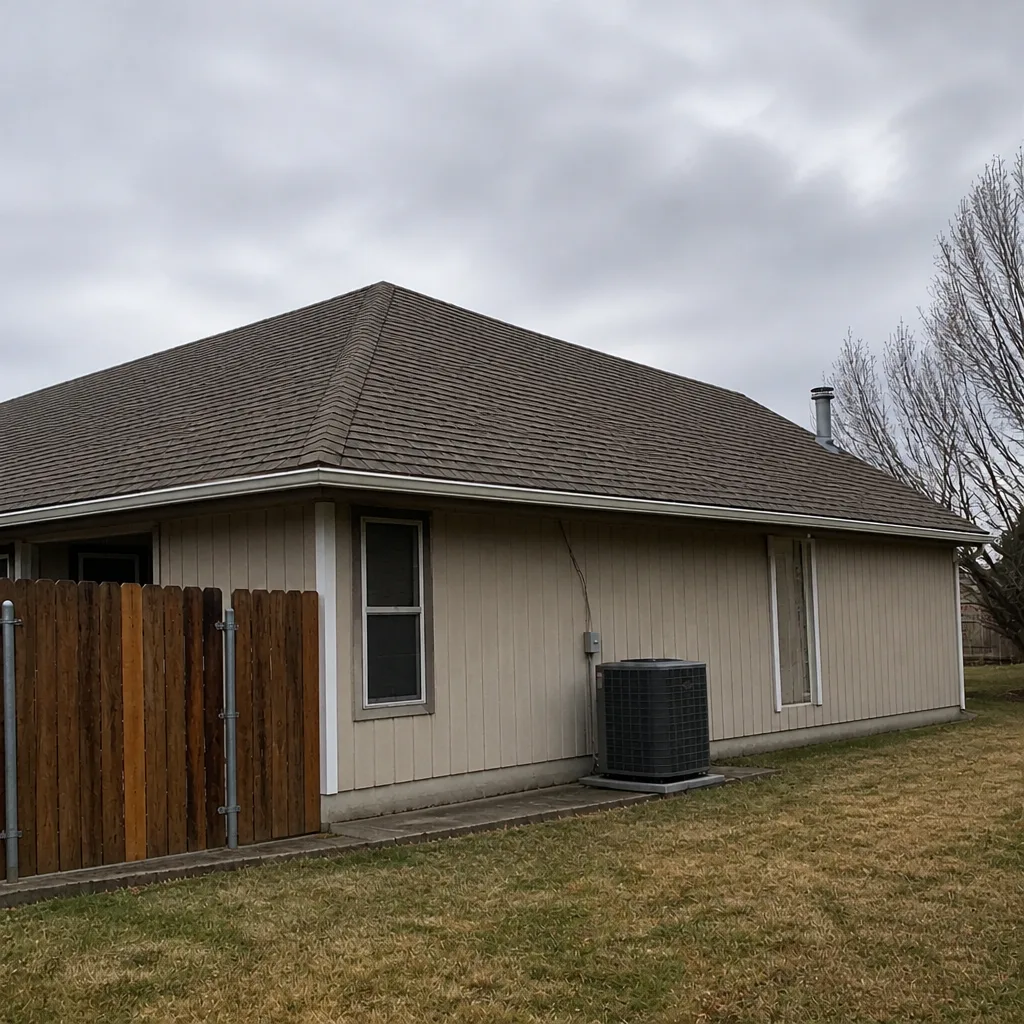 After
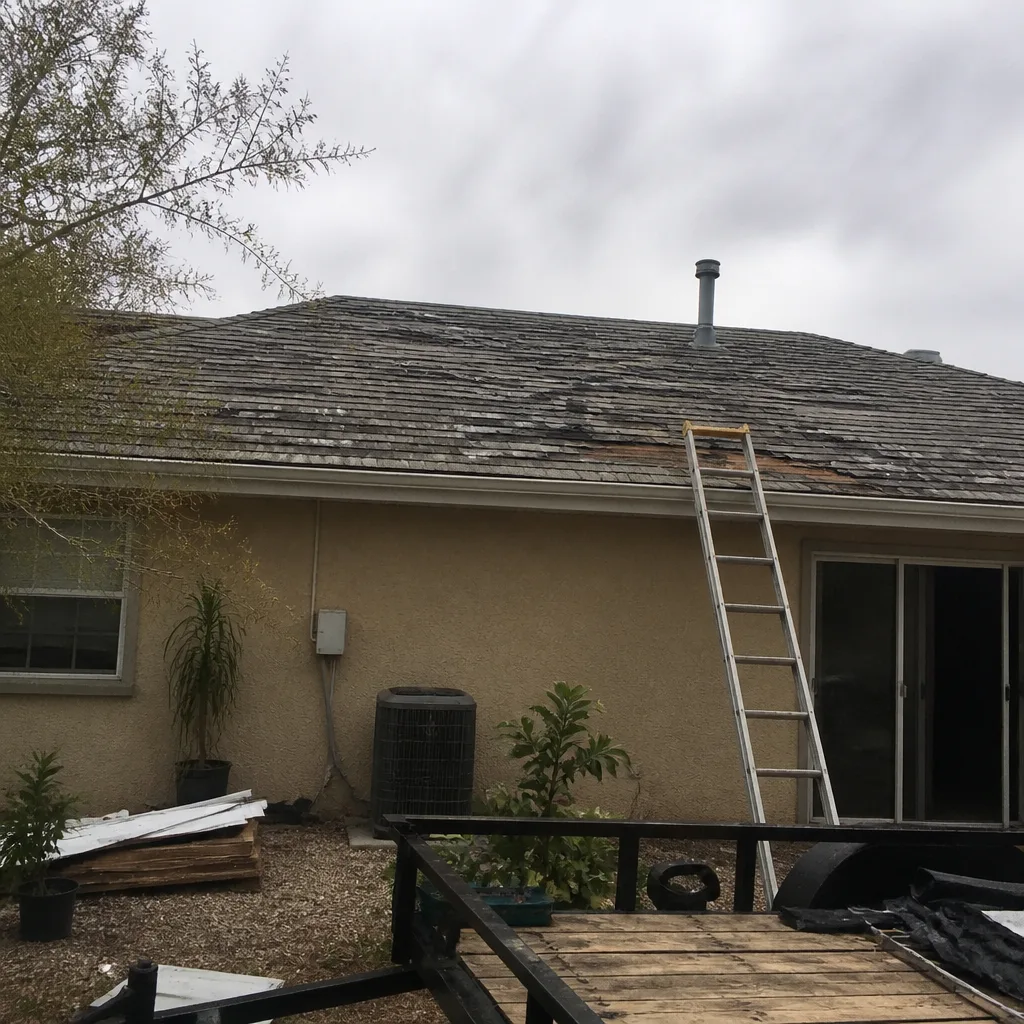 Before
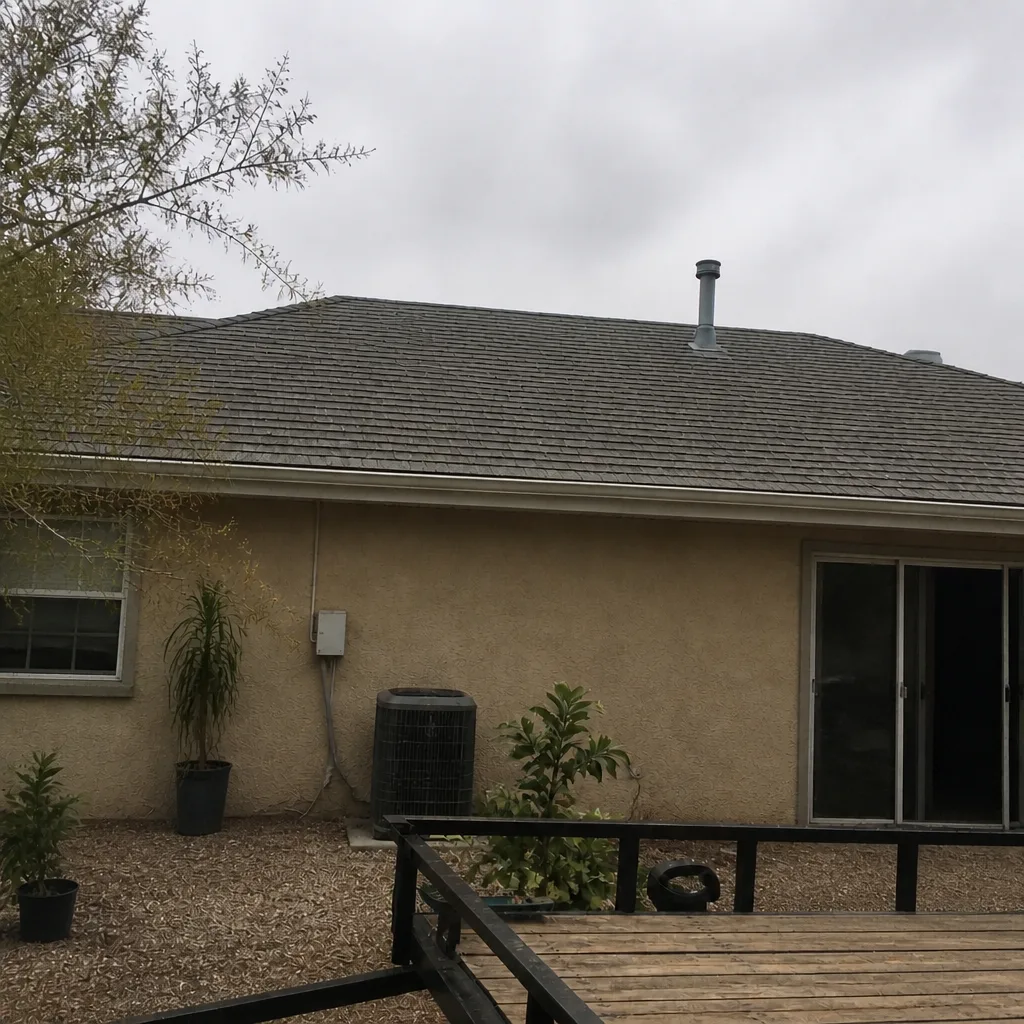 After
When to Call a Professional
Call a roofer when you have an active leak that won’t stop, when the water is finding its way near electrical or into attic insulation, when the stain is growing during storms, or when a failed specialty system needs a repair that goes beyond a pen-and-sealant stopgap. Call when you can’t safely get to the roof (any foam, metal, or tile roof, honestly, is not worth climbing on if you’re not used to it). Call when a contractor’s diagnosis doesn’t hold together, and you want an honest second set of eyes on a written estimate. Shepherd & Sons Roofing Whitney offers free estimates in Whitney and will tell you straight whether a repair is the right fix or whether the system is at end of life. Call (844) 797-9455.
Frequently Asked Questions
Look at the surface: a bright, dense, often tan or white seamless material with visible penetrations sealed in is spray foam; visible metal panels with horizontal seams and screws or raised standing seams is metal; overlapping individual tiles is tile or clay; a rolled membrane with visible overlapping seams is likely modified bitumen. If you can’t tell, it’s worth a call. A wrong diagnosis on a specialty roof starts with a wrong system identification.
Yes, often. A foam roof can have a penetration leak with a fully intact coating cover visible from above, and a tile roof can leak through failed underlayment with every tile intact. That’s why we trace a leak from the attic down, and why surface inspection alone tells you only part of the story. Call (844) 797-9455 for a leak inspection that follows the water, not just the surface.
It depends on the repair and the system. A properly re-covered foam penetration or a replaced metal fastener with a new washer is a durable repair. A sealant-only fix is temporary by design, usually weeks to a season. What’s important is knowing which you’re getting, so ask your contractor. Call for an exact scope and price, in writing.
It makes different problems. UV exposure wears foam coating, thermal cycling backs out metal fasteners and separates modified bitumen seams, and dry heat ages tile underlayment. Whitney’s rain is often monsoon-driven and wind-blown, which pushes water sideways into weak spots a straight rain wouldn’t touch. That’s why a diagnosis from someone who works these roofs every week here in Whitney matters.
Sometimes a temporary stopgap during an active storm can be done at a located entry point, but storm work has to be prioritized for safety and usually means at minimum stopping the water and returning for the real repair. Call (844) 797-9455 and we’ll tell you straight what can be done now versus what needs to wait for the roof to dry.
Yes. If another contractor diagnosed your specialty roof and gave you a written estimate, we’ll come look at it and give you a free second opinion. We’ll show you the deck photos before we talk money, and the estimate is free. If a repair is the right answer, we’ll tell you. If it’s throwing good money after bad, we’ll tell you that too. Call (844) 797-9455.
The Bottom Line
Troubleshooting a specialty roof comes down to knowing how that system fails and where. Foam leaks start at penetrations and coating wear. Metal leaks start at fasteners and closures. Tile leaks usually start at aging underlayment under an intact tile field. Modified bitumen leaks start at seams. Trace interior stains uphill from the attic rather than looking straight up, use temporary fixes only at located entry points, and ask a contractor the questions that separate a real diagnosis from a guess. When a repair is the right money spent, do it. When the system is at end of life, plan for replacement. Same address since 1996 – call (844) 797-9455 for a free estimate in Whitney.
Written by the team at Shepherd & Sons Roofing Whitney.